Most patients seeking restorative care have done their homework and are well-informed on restorative dental procedures. Often, they express concerns about any treatment that requires removal of healthy tooth structure and seek advice on alternative types of procedures designed to preserve as much tooth structure as possible while providing them the highly esthetic outcome they desire.
When considering cosmetic treatment for patients who have retained a majority of their natural teeth, especially young adults, it is of utmost importance to preserve as much tooth structure as possible. Cosmetic treatment often involves placement of veneers to achieve a highly esthetic outcome. Although conventional porcelain veneer treatment approaches are still prescribed for a majority of patients receiving cosmetic care, improvements in restorative materials and conservative techniques offer clinicians the possibility to deliver highly esthetic and long-lasting outcomes using minimally invasive or no-preparation veneers to esthetically restore a smile and even straighten misaligned teeth. 1,2,3,4
As esthetic dentists, we are in a true sense custom designers. Much like the architect, interior, fashion designer, artist, or plastic surgeon, we create a design that reflects the individual nature of our patients. The objective is to capture the essence of that patient. Therefore, it is important to ask questions such as: How do you live your life?; What are your primary interests?; What inspires you? All those personality traits impact the oral design smile process and correlate to tooth shapes and arrangements chosen.5
Fig.1 [Below, left]: Pre-op photo of a young 32-year-old adult male patient who came the practice for consultation.
Fig. 2 [Below, right]: The patient’s narrow jaw also revealed deficient buccal corridor when smiling.


A 32-year-old male in good health presented to the practice for consultation (Figure 1). His chief complaint was the esthetics of his smile. He was concerned by the chipping occurring on his maxillary central incisors (Figure 2), the discolorization of tooth #8 and the crowded teeth in the lower anterior arch (Figure 3). He wanted a smile makeover to address these concerns and a case outcome that would give him a brighter, whiter more natural-looking smile.
A preliminary examination revealed his teeth on both arches were natural. Composite restorations on tooth #8 and the midline of #8 and #9 were deteriorating and discolored. His lower anterior teeth displayed moderate crowding on teeth #22-#26, which was contributing to the chipping of his two central incisors. The patient’s narrow jaw when smiling revealed deficient buccal corridors from molars to canines which impacted the esthetics of his smile6 (Figures 4 and 5).
The patient was assured that his concerns could be addressed and esthetics restored by placing minimally invasive veneers on teeth #4-#13 in the maxillary arch to restore teeth #8 and #9 and fill in the buccal corridor to broaden his smile and create a smile-lifting effect. To address the overcrowding on teeth #22-#26 veneers would be placed on teeth #21-#28 on the mandibular arch, with the focus on straightening and creating proper tooth form on teeth #22-#26 to eliminate overcrowding and occluding interference with his central incisors.
Fig. 6 [Below, left]: To aid the patient in visualizing and accepting the proposed case outcome, a 2D smile design software was used to show him a blueprint of the proposed new smile.
Fig. 7 [Below, right]: When the new smile was shown to the patient, he immediately agreed to move forward with the proposed treatment plan to place minimally invasive veneers on teeth #4-#13 in the maxillary arch and teeth #21-#28 in the mandibular arch.


One of the most powerful tools dentists can use to assure case acceptance is to provide the patient with a visual of the proposed case outcome. Using one of the many 2D digital smile design software programs on the market, the author uploaded measurements of the patient’s mouth and a photograph of the patient smiling into a calibrated smile design software (SmileFy, www.smilefy.com) (Figure 6). Selecting tooth forms from the digital tooth library, the blueprint of patient’s proposed new smile was revealed and the patient immediately accepted the treatment plan (Figures 7 and 8).
At the second diagnostic record-taking appointment, routine full-mouth X-rays revealed no underlying decay and his periodontium was deemed healthy upon probing. Evaluation of his TMJ was deemed negative. A series of pre-op photos were taken along with a bite registration and facebow transfer, which were sent to the master ceramist along with the pre-op photographs, a 30-second video showing the dynamics of the patient’s face in motion, bite registration, and impressions (analog or digital IOS) to create the 3D diagnostic waxup and putty matrix for provisionalization.
Note: It is imperative that the interdisciplinary team of restorative dentist and master dental technician work together in real-time utilizing analog and digital technologies to achieve predictable case success.
Fig. 8 [Below]: When the new smile was shown to the patient, he immediately agreed to move forward with the proposed treatment plan to place minimally invasive veneers on teeth #4-#13 in the maxillary arch and teeth #21-#28 in the mandibular arch.

Two weeks later the patient returned for a 2-hour appointment to prepare and provisionalize his maxillary arch. The patient was retracted (Optragate, Ivoclar Inc.) and anesthetized. In any minimally invasive technique, tooth preparation is one of the most important elements of long-term success because of the bond value to enamel versus dentin and for providing the ceramist with the preparation needed for the best esthetic result.7,8,9,10
To ensure proper emergence profile of the minimally-prepped veneers and prevent over/under preparation, the putty matrix provided by the laboratory that replicates the diagnostic waxup is used to create a facial reduction prep guide that will allow removing a minimal amount of tooth structure using a depth cutting diamond (Komet, www.komet.com) 7,8,9,10 (Figures 9 and 10).
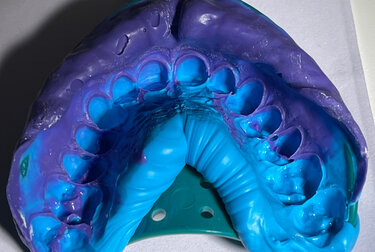
The only maxillary teeth in this case that required more preparation were #8 and #9 because of composite restorations in the midline area and on the surface of #8 to allow masking of the discolored composite. A CO bite was taken (Futar D, Kettenbach Industries), and stump shade photo taken with appropriate shade tab. Then final impressions were taken of the prepared maxillary arch and sent to the laboratory (Figures 11 and 12).
Fig. 9 [Below]: A self-curing provisional material was used to create highly esthetic temporaries.
Fig. 10-11 [Below, Left and right]: Final impressions were taken of the prepared maxillary arch and sent to the laboratory.


The prepared teeth in the maxillary arch were spot etched (Total Etch, Ivoclar Inc.), a bonding agent applied (Adhese, Ivoclar Inc.) and the putty matrix filled with self-curing provisional material (LuxaTemp, Ivoclar Inc.) (Figure 13) and inserted into the mouth. After 4 minutes the putty matrix was removed and the provisionals ready for refinement. (Figure 14). To make the provisionals come alive, all excess material was removed, tooth shapes refined, margins adjusted and occlusion verified. The patient approved the shade and shape of the provisional restorations and was instructed to return a week later when not numbed from anesthesia to ensure fit, function and esthetics met expectations. A week later the patient returned to the practice and confirmed with the dentist, the fit, function and esthetics of the provisionals. Photographs, a video, and a final impression of the provisionalized patient were taken for communication with the laboratory for delivery of the final restorations. In collaboration with Oral Design master ceramist, Peter Kouvaris MDT NYC, it was determined that shade OM2 Natural (Vita 3D Master, VITA) would be used for the final restorations. To provide the patient with the desired strength and esthetics as well as with a material that could be pressed to the minimal thickness some teeth in this case required, it was decided that a lithium disilicate material would be used (IPS e.max Press, Ivoclar Inc.).
The patient returned three weeks later for seating of the final maxillary restorations. The patient was retracted (Optragate, Ivoclar Inc.) and the temporaries were gently removed. Prior to final bonding, an esthetic try-in paste (Variolink Esthetic, Ivoclar Inc.) was applied to selected veneers to verify shade, then cleaned and dried. Then, the prepared teeth were acid etched, an adhesive applied (Adhese, Ivoclar Inc.), and light cured for 20 seconds. Each veneer was cleaned (Ivoclean, Ivoclar Inc.) and a primer applied (Monobond Etch and Prime, Ivoclar Inc.). Luting composite shade Light (Variolink Esthetic, Ivoclar Inc.) was applied to each veneer and seated. A brush was used to remove any excess material, then each veneer was tacked and cured (FlashLite Magna 4.0, Denmat). An ultra-fine ET diamond (Komet. Brasseler Inc.) was used to clean the margins and a separating strip (Komet, Brasseler Inc.) used to clean the proximals of any material and adjust occlusion. Rubber polishing points (Ivoclar Inc.) were used to fine polish each restoration.
One week later the mandibular arch was prepared (Figures 15 and 16) and provisionalized. Teeth #23-#26 required more preparation to open the distal contacts on #23, the mesial and distal contacts on #24 and #25 to correct the moderate overcrowding and create an optical illusion that the teeth are in a natural position. Final restorations were delivered three weeks later and seated using the same protocols (Figures 17, 18, 19).
The patient was extremely pleased with the case outcome (Figures 20-22) and wears a provided nightguard at night for an added level of insurance against damaging the restorations during sleep.

With careful case selection and knowledge of proper tooth preparation, material selection, and adhesive protocols patients can successfully be restored using minimally invasive veneers. This case demonstrates that highly esthetic outcomes can be achieved to restore natural tooth form and shape to broaden a patient’s smile line and correct moderate overcrowding.
Receive our monthly newsletter on recently published blog articles, upcoming education programs and exciting new product campaigns!
References
-
Smielak, B., Armata, O. & Bojar, W. A prospective comparative analysis of the survival rates of conventional vs no-prep/minimally invasive veneers over a mean period of 9 years. Clin Oral Invest 26, 3049–3059 (2022). https://doi.org/10.1007/s00784-021-04289-6
-
Calamia JR, Calamia CS. Porcelain laminate veneers: reasons for 26 years of success. Dent Clin North Am 2007;51(2):399-417, ix
-
Vanlıoğlu, B. A., & Kulak-Özkan, Y. (2014). Minimally invasive veneers: current state of the art. Clinical, cosmetic and investigational dentistry, 6, 101–107. https://doi.org/10.2147/CCIDE.S53209
-
Morita RK, Hayashida MF, Pupo YM, Berger G, Reggiani RD, Betiol EA. Minimally Invasive Laminate Veneers: Clinical Aspects in Treatment Planning and Cementation Procedures. Case Rep Dent. 2016;2016:1839793. doi: 10.1155/2016/1839793. Epub 2016 Dec 13. PMID: 28070427; PMCID: PMC5187491.
-
Rambabu T, Gayatri C, Sajjan GS, Karteek Varma PV, Srikanth V. Correlation between Dentofacial Esthetics and Mental Temperament: A Clinical Photographic Analysis Using Visagism. Contemp Clin Dent. 2018 Jan-Mar;9(1):83-87. doi: 10.4103/ccd.ccd_788_17. PMID: 29599590; PMCID: PMC5863416.
-
Bhuvaneswaran M. Principles of smile design. J Conserv Dent. 2010 Oct;13(4):225-32. doi: 10.4103/0972-0707.73387. PMID: 21217950; PMCID: PMC3010027.
-
LeSage B. Establishing a classification system and criteria for veneer preparations. Compend Contin Educ Dent. 2013;34(2):104-112. 114-115; quiz 116-117.
-
Gurel G, Morimoto S, Calamita MA, Coachman C, Sesma N. Clinical performaance
-
of porcelain laminate veneers: outcomes of the aesthetic preevaluative temporary (APT) technique. Int J Periodontics Restorative Dent., Dec;32(6):625-35.
-
Jing Gao DDS, Jinxiu He DDS, Lin Fan DDS, Jiayi Lu DDS, Haiyang Yu DDS, MSc, PhD. Accuracy of Reduction Depths of Tooth Preparation for Porcelain Laminate Veneers Assisted by Different Tooth Preparation Guides: An Invitro Study. Journal of Prosthodontics, December 2021. https://doi.org/10.1111/jopr.13456
-
Sisler, Zachery S., DDS, Preparation Guides: 10 Steps to Maximize Success for Veneer Preparation. Journal of Cosmetic Dentistry, Volume 35, Issue 4, 26-33.