Originally printed in Journal of Dental Technology, October 2024
Written by Will Varda
When it comes to dental prosthetics, there has been a big shift in design philosophy over the last ten years. While the focus was always on analog to digital transitions, it’s important to understand that the greater shift was not primarily a change in tooling, but rather, the concept that we should first start with an esthetic idea and then design from that vision forward. No longer is it acceptable to simply produce what you can with an impression of prepped teeth working around the given reductions. In the same way, we no longer fully accept the idea that we place implants where the bone is and then deal with the prosthetic outcome later. Facially driven, esthetically driven, and patient focused – these are new principles by which we must work. The design is first, the idea is first, the desired end outcome is first, and only after that, do we begin the work. The transition to digital workflows is not in and of itself sufficient to achieve this. It is, however, an incredible tool that makes this new philosophy predictable and simple. Working in this way only functions if the clinician and technician can see eye to eye in this vision and working with Dr. Ed Lowe on the following case has been a great pleasure.
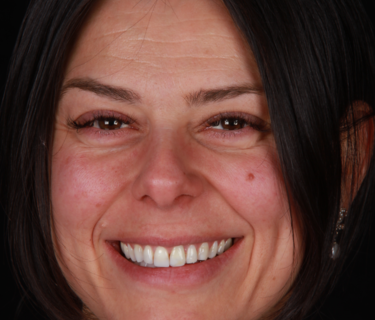
The journey for Enisa began with making an appointment to discuss her current smile. She is a 38-year-old entrepreneur, wife, and mother of 3 young children. Enisa is in good health and not taking any medications. Her personality type is cooperative and pleasant.
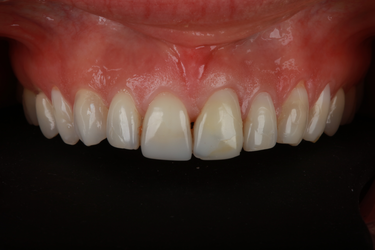
A volleyball accident at 12 caused her to fracture upper central incisors. Unfortunately, the impact led to subsequent root canal therapy on #2-1 in her teens. The broken centrals were initially restored with composite Class IV restorations and when she was in her early thirties, composite resin veneers were placed on her upper six anterior teeth #1-3 to #2-3.
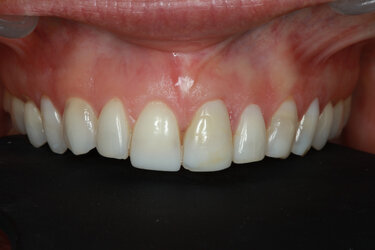
So, we begin with an idea. The simplest way to express this idea is through 2D smile design. Using 3Shape Smile Design or similar programs, we can very rapidly sketch out a concept (Fig. 1). Utilizing cant, length, symmetry and patient input on shape, much of the rough draft can be hammered out very quickly. A 2D smile design that is based solely on a picture, however, can also get you into trouble. It is very easy to overpromise outcomes that you cannot clinically achieve. Once the idea is born, we can then move into 3D smile design, which is design based off intraoral scans (Fig. 2).
Figure 1 (below): A 2D smile design that is based solely on a picture, however, can also get you into trouble.

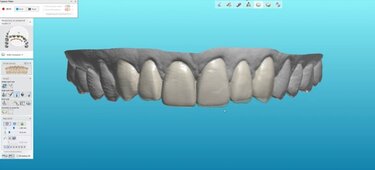
Figure 2 (above): A 2D smile analysis in 3D space.
Here we will spend time looking at how the proposed design will influence prep considerations. Notice, this is the opposite of the historical approach of looking at how preps will influence design considerations! In the case for Enise, who was a lovely patient to work with, she expressed an interest in minimal prep veneers. By overlaying our design in semi-transparency over the pre-preparation scans, we can see exactly how feasible this is and can prepare ourselves for exactly which tooth structures will need the most attention ahead of time.
Once we have a design that the patient likes, and the clinician finds feasible, we can begin by finalizing the design into a 3D printed model and making putty matrixes. Attention should be spent making the design feather very precisely into all areas of the gingival margin to ensure that there will be minimal flash for the dentist to clean up. The design is then tried in the mouth, either as a positive only overlay, or as temporaries after the teeth have been prepped. The temps are adjusted, and midline, tooth display, and phonetics are analyzed. Very critically, the patient has time to spend looking and giving their feedback as well. Then the temps are scanned.
Figure 3a (below): Building a case scan by scan. Here the original waxup is overlayed with the new preps.

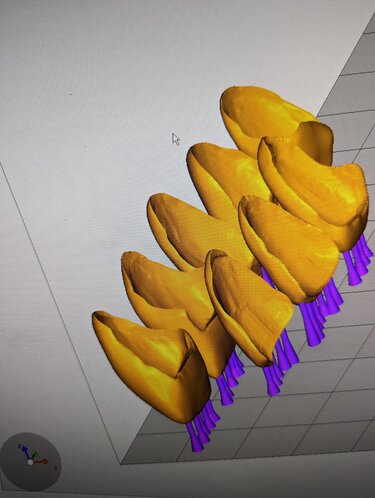
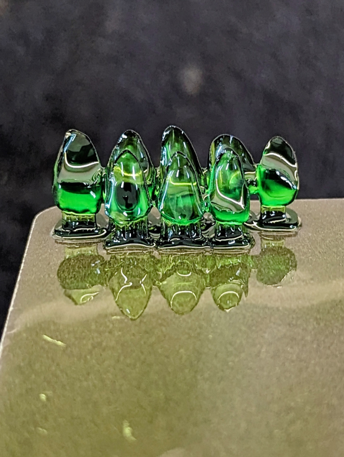
Figure 3b (above, left), Figure 3c (above, right): Printing Designs
The true predictability of digital workflows now has a chance to really shine. The lab can take that scan and superimpose it over the original scan and the original design. Here, the technician can see where adjustments were made to the diagnostic wax-up and exactly where the clinician prepped the teeth. With the overlay of pre-preparation, the original design, the temps in the mouth, and preparation scans, there is nothing left to guess. We can see, for example, if there are any under-prepped areas by taking measurements between the temp in the mouth and the prep scan underneath it, and then communicate this directly to the doctor through pictures, videos, or live design sessions over the technician’s computer virtually (Figs. 3a-c).
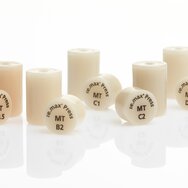
Finally, when everyone agrees with the adjustments made chairside, and then further adjustments are made computer side, we can adapt our design to the margins of the preparation. For veneers, my go-to is always printed and pressed IPS e.max Press (Figs. 4a-b). While I can mill these on one of my Ivoclar PM7 mills, the additional space required to accommodate the burr can create hollow channels along the incisal edge which may lead to difficulties with color uniformity (Figs. 5a-b). Pressed IPS e.max Press from 3D printed patterns, however, doesn’t need this drill compensation and can achieve a much more uniform and intimate fit (Figs. 6a-b).
Usually, you have the younger techs who are all fired up about technology, and the older ones, who have immense experience to offer, yet are often wary of technology. Anyone who has spent time in a lab knows this delicate interplay of hard-earned experience and youthful exuberance to try every new thing. Introducing print to press in my lab was not without its share of skepticism from the old guard. The results, however, speak for themselves. The old ideas that we must hand-wax or do some very inefficient workflow of waxing and then scanning, or even worse, feel the need to ‘re-seal’ the printed margins, are all very easy to overcome with the wide array of excellent 3D printers on the market and the vast amount of online technical information on usage. 3D printed crowns fit undeniably perfect using solid, but simple, technique with good equipment and good resin. Once the first mispress happens and the old-guard techs sink into bitter thoughts, you can respond with smile and say, “no worries, you’ll have another exact replica in 45 minutes!” That should help convince even the most battle weary among them.
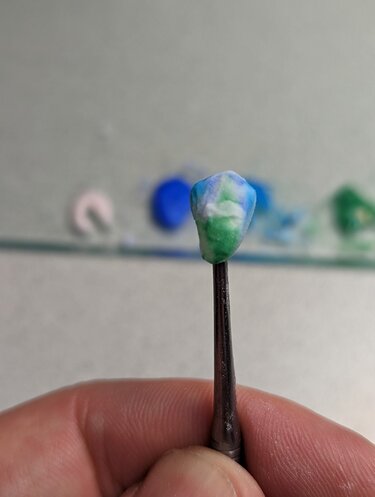
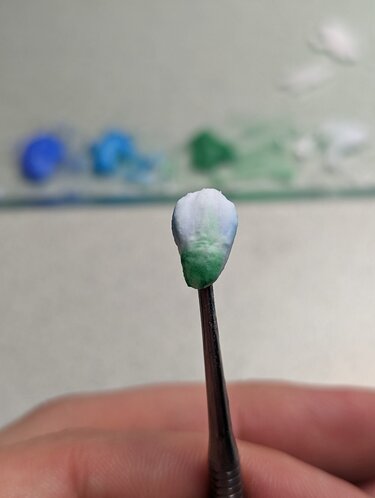
Everything is not 100 percent digital at my lab. While there have been big advancements in glaze and the application of micro-layered porcelain slurries, there really is no true replacement for the esthetics of hand-stacked feldspathic porcelain. At least that is the lingering romantic sentiment in this middle-aged dental technician’s heart! Perhaps I will in turn be called an ‘old guard’ in response. Various mixtures of Ivoclar’s IPS e.max Press ceram incisal, effects, and modifiers are stacked to create some depth and help break up the ubiquitous monolithic heaviness of purely digital workflows (Figs. 7a-e).
Figures 7a (bottom, left) & 7b (bottom, right): Hand stacking IPSe.max Press ceram
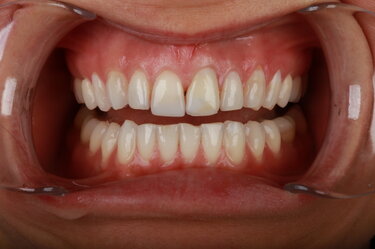
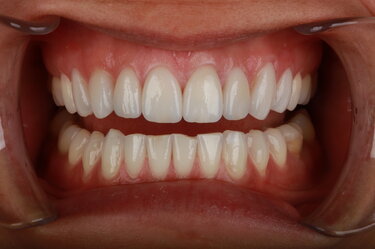
In this patient’s case, to add to the fun and provide a sporting feel, all eight veneers where placed, bonded, and finalized live on the mainstage of the 2023 Pacific Dental Conference in Vancouver, Canada. I sat in my chair nervous and sweating as each veneer was seated, but Dr. Lowe and his assistants knocked it out of the park, confidently placing them all to polished completion in 30 minutes. Might that have happened with the ‘prep first, figure it out later’ philosophy? Perhaps, but I’m glad I didn’t have to find out. Design and esthetics as the first guiding principles, careful planning and superimposition of all data throughout, and a hybrid of digital and analog techniques to get the reproducibility and fit of digital with some handmade analog touches, all came together to produce a predictable and pleasant outcome (Figs. 8a-b).
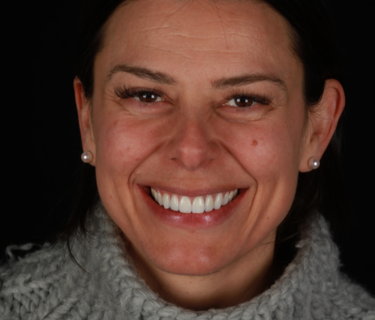
A big thank you to Dr. Ed Lowe for the fun collaboration, to Ivoclar for their outstanding products, to my team at the lab to help me run all the many apparatuses of the modern dental lab, and to a very generous and warm patient who allowed us to share her story.

Will Varda is the owner of Anvarda Dental Services in North Vancouver, BC, Canada. A second-generation lab tech, he grew up with a lab down the hallway from his childhood bedroom. Traditionally trained as a ceramist, he has spent the last decade deep diving into everything digital. You can find him on any one of dozens of digital dentistry Facebook groups or lecturing for 3Shape in Chicago or at the PDC. He is the president of the Dental Technician Association of BC and loves learning and sharing ideas from techs around the world. Sometimes, he even makes teeth.
Receive our monthly newsletter on recently published blog articles, upcoming education programs and exciting new product campaigns!
